
A few weeks ago, I repaved my windows laptop with the technical preview of windows 10. As I explained in last week's post, I have not been doing a whole lot of .net development these days and therefore have not been using Visual Studio much either. So I removed Visual Studio, Sql Server and a couple other heavy installs from my boxstarter script that I do not use. However, I do still actively maintain a project that is largely a collection of powershell modules but also includes a small click-once installer and a Razor based web site hosted on Azure that serves the documentation and latest download.
Both the click-once and web application are housed within Visual Studio projects and each include a .csproj file that drives the build. In the past I have always had Visual Studio installed and therefore had all the build tools on hand such as msbuild.exe, signtool.exe and web deploy that my build script could call to build and deploy the bits.
Well it was time to push out a maintenance release the other day and I wanted to do so without installing Visual Studio. Don't get me wrong, Visual Studio is an incredible tool but if you don't need it, why install it? Its quite large and my 128GB SSD is rather greedy. This is not only sound reasoning for a developer machine but it is even more applicable to a build server. I have known lots of folks who think they need to install Visual Studio on the build server in order to build their .net apps. Perhaps there are a couple edge cases where this is so but for most build and deploy tasks, the tools you need can be downloaded separately.
I'll cover the pieces I use to build and deploy Boxstarter here and walk you through the key build tasks. You can find the entire build script here which includes tasks for building and running Pester tests as well as the one task I run that deploys the packages to Chocolatey, creates a github release with zip file and deploys the web bits and click-once installer to Azure. Let me tell you it is very convenient to deploy everything with a single command. There is no database so its easy.
Compiling with msbuild
Both my click-once install and my web project need to be compiled to a .dll. This is done via msbuild. While msbuild does come included with visual studio, it can be downloaded separately with the Microsoft Build Tools. I get this and most other build prerequisites from Chocolatey:
task Install-MSBuild {
    if(!(Test-Path "$msbuildExe")) { cinst microsoft-build-tools }
}

task Build-Web -depends Install-MSBuild, Install-WebAppTargets {
    exec { .$msbuildExe "$baseDir\Web\Web.csproj" /t:Clean /v:minimal }
    exec { .$msbuildExe "$baseDir\Web\Web.csproj" /t:Build /v:minimal /p:DownloadNuGetExe="true" }
    copy-Item -Path "$baseDir\packages\bootstrap.3.0.2\content\*"`
      -Destination "$baseDir\Web" -Recurse -Force `
      -ErrorAction SilentlyContinue
}
Note that my build uses psake which compose the build from calls to a powershell function, Task, that define a script block to specify the code that the task actually runs. These tasks can optionally include dependencies which must be run prior to the task. Here my Build-Web task depends on Install-MSBuild to check and install the msbuild tools if they are not already installed.
Web application targets
Plain msbuild comes with most of the standard target files needed to build most visual studio project types. For whatever reason, web projects reference target files located in the visual studio install. However you can obtain these files by installing the MSBuild.Microsoft.VisualStudio.Web.targets nuget package. This check and potential install is handled in the Install-WebAppTargets task of my build script:
task Install-WebAppTargets {
    if(!(Test-Path "$env:ChocolateyInstall\lib\MSBuild.Microsoft.VisualStudio.Web.targets.12.0.4\tools\VSToolsPath\WebApplications\Microsoft.WebApplication.targets")) {
        cinst MSBuild.Microsoft.VisualStudio.Web.targets -source http://packages.nuget.org/v1/FeedService.svc/ -version '12.0.4'
    }
}
I also edit the path to Microsoft.WebApplication.targets at the end of my web project's .csproj file to reference these targets from the chocolatey lib directory:
<Import Project="$(ChocolateyInstall)\lib\MSBuild.Microsoft.VisualStudio.Web.targets.12.0.4\tools\VSToolsPath\WebApplications\Microsoft.WebApplication.targets" Condition="'$(VSToolsPath)' != ''" />
Code signing the click-once payload
Boxstarter can be invoked from a URL which leverages "click-once" technology. Click-once apps must be signed with a valid code signing certificate. Although I invoke the click-once build with msbuild.exe:
task Build-ClickOnce -depends Install-MSBuild, Install-Win8SDK {
    Update-AssemblyInfoFiles $version $changeset
    exec { .$msbuildExe "$baseDir\Boxstarter.ClickOnce\Boxstarter.WebLaunch.csproj" /t:Clean /v:minimal }
    exec { .$msbuildExe "$baseDir\Boxstarter.ClickOnce\Boxstarter.WebLaunch.csproj" /t:Build /v:minimal }
}
Boxstarter.WebLaunch.csproj includes a post build step that signs the click once payload with my certificate:
<PostBuildEvent>"$(WindowsSDK80Path)bin\x64\signtool.exe" sign /n "Open Source Developer, Boxstarter.org" "$(ProjectDir)obj\debug\Boxstarter.WebLaunch.exe"</PostBuildEvent>
Note that this assumes that I have imported a certificate into my user certificate store that has the subject name: "Open Source Developer, Boxstarter.org" and that it includes the private key.
As you can see, signtool.exe lives in the Windows 8.1 SDK which is not included with the build tools that provide msbuild. You will need to install the windows 8.1 SDK available here. I install it via chocolatey like most others in polite society:
task Install-Win8SDK {
  if(!(Test-Path "$env:ProgramFiles\Windows Kits\8.1\bin\x64\signtool.exe")) {
    cinst windows-sdk-8.1
  }
}
Deploying to Azure Websites
When I initially created the web project in Visual Studio, I used to use the visual studio UI to deploy the files to my azure website. That works well but I wanted to include it as a step in my command line build. This is accomplished by calling msbuild with the correct properties describing the publish properties and password to use:
task Publish-Web -depends Install-MSBuild, Install-WebDeploy {
    exec { .$msbuildExe "$baseDir\Web\Web.csproj" /p:DeployOnBuild=true /p:PublishProfile="boxstarter - Web Deploy" /p:VisualStudioVersion=12.0 /p:Password=$env:boxstarter_publish_password }
}
The key properties here are the profile name and password. I keep my password in an environment variable so I don't store it in clear text on github. You can get both the profile name and password from the azure portal:

This downloads an xml file with both the name and password embedded inside.
In order for this to work without visual studio installed, you will need to install Web Deploy available here. Because I'm not a barbarian, I grab this from Chocolatey:
task Install-WebDeploy {
    if(!(Test-Path "$env:ProgramW6432\IIS\Microsoft Web Deploy V3")) {
      cinst webdeploy
    }
}
Wrapping up with psake
As mentioned above, I use psake to drive the build and manage all of the task dependencies. If you don't care for programming in xml and especially if you are comfortable with powershell, you may find psake much more palatable than dressing up csproj and target files.
I've wrapped the call to invoke psake in a simple batch file, build.bat, so that the build can be invoked either from powershell or the Fisher-Price style command line CMD.exe making it compatible with any build server.
So simply typing build followed by the task name I want to run, kicks off my build:
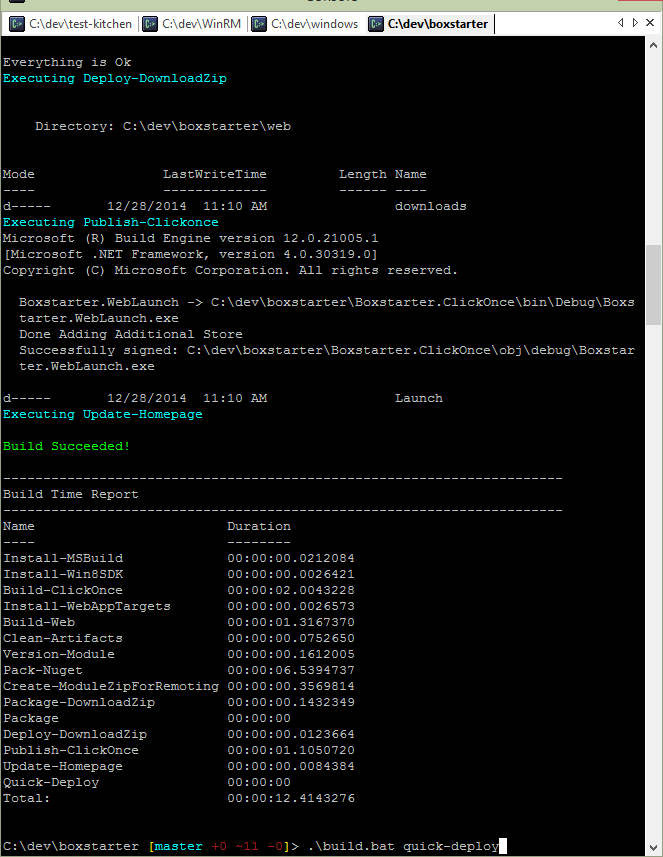
build deploy # runs build, tests and packages everything for deployment
build Push-Public # deploys to chocolatey, github and azure