
Update 2: See this new post that includes everything here and also automates everything via Packer and Boxstarter.
Update: More on packaging windows 10 Hyper-V and comparison of LZMA vs. GZIP compression can be found in this more recent post. My conclusion is that gzip is bigger but better.
Windows... No getting around it - its a beast compared to the size of its linux step sibling. When I hear colleagues complaining about pulling down a couple hundred MB to get their linux vagrant box up and running, I feel like a third world scavenger of disk space while they whine about their first world 100mb problems. While this post does not solve this problem, it does provide a way to deliver a reasonably sized windows box weighing in under 3GB.
This post will explain how to:
- Obtain a free evaluation server 2012 R2 ISO
- Prepare a minimally sized VM image
- Package the VM for use via vagrant both in VirtualBox and Hyper-V
- Allow the box to be accessed by others over the web. The world wide web.
I may follow up with a more automated approach but here I'll be walking through the process fairly manually. However my instructions will largely be command line samples so one should be able to cobble together a script that performs all of this. I will be doing just that.
Downloading an evaluation ISO
The Technet evaluation center provides free evaluation copies of the latest operating systems. As of this post, the available operating systems are:
- Server 2012R2
- Server 2012
- Server 2008 R2
- Windows 8.1
- Windows 8
- Windows 7
These are fully functional copies with a limited lifetime. I believe the client SKUs are 90 days and the server SKUs are 180 days. Server 2012 R2 is definitely 180 days. Once the evaluation period expires, you can download a new evaluation and the trial period begins anew. Some may say like a new spring. Others will choose to describe it differently but either way it is perfectly legit.
The evaluation center provides several formats for download including ISO, VHD, and Azure VM. I prefer to download the ISO since it is much smaller than the VHD and it can be used to create both a Hyper-V and VirtualBox VM.
Create the VM
I am assuming here that you are familiar with how to do this on your preferred hypervisor platform. However I recommend that you choose the following file formats:
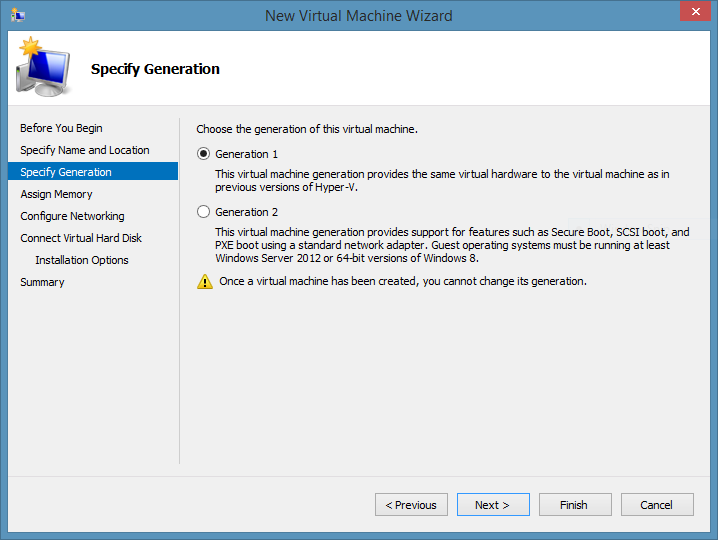
VHD (gen 1) on Hyper-V
Unless you know that this vagrant box will only be used on windows 8.1 or server 2012 R2 hosts, a generation 2 .vhdx format will not work on older OS versions. Chances are that most vagrant use cases will not be taking advantage of the generation 2 features anyways.
.vmdk on Virtual Box

The reason for this will become more apparent when we get to packaging the VM. The short answer here is that this is going to put you in a better position for a more optimally compressed (likely much more) box file.
Note: You cannot run Hyper-V and VirtualBox on the same machine. You can create second boot record, but I have had too many bad experiences uninstalling VirtualBox on windows and ending up with a corrupted network stack. So I am using Hyper-V on my windows box and VirtualBox on my Ubuntu machine.
When the ISO installation begins, you will be given a choice of Standard or DataCenter editions as well as whether to install with the GUI or not. I am installing Server 2012 R2 Standard with GUI.

Preparing the image
Here we want to ensure our VM can interact with vagrant with as little friction as possible and be as small as possible.
Configuring the vagrant user
By default, vagrant handles all authentication with a user named 'vagrant' and password 'vagrant'. So we will rename the built-in administrator to 'vagrant' and change the password to 'vagrant'.
First thing that needs to happen here is to turn off the password complexity policy that is enabled by default on server SKUs. To do this:
- Run gpedit from a command prompt
- Navigate to Computer Configuration -> Windows Settings -> Security Settings -> Account Policies -> Password Policy
- Select 'Password must meet complexity requirements' and disable

Good riddens complexity!
Now we jump to powershell and rename the administrator account and change its password to vagrant:
$admin=[adsi]"WinNT://./Administrator,user"
$admin.psbase.rename("vagrant")
$admin.SetPassword("vagrant")
$admin.UserFlags.value = $admin.UserFlags.value -bor 0x10000
$admin.CommitChanges()
This may be obvious but that second to the last line instructs the password to never expire. Its a good idea to reboot at this point since you are currently logged in as this user and things can and will get weird eventually if you don't.
Configure WinRM
While server 2012 R2 will have powershell remoting automatically enabled, we need to slightly tweak the winrm configuration to play nice with vagrant's ruby flavored winrm implementation:
winrm set winrm/config/client/auth '@{Basic="true"}'
winrm set winrm/config/service/auth '@{Basic="true"}'
winrm set winrm/config/service '@{AllowUnencrypted="true"}'
Allow Remote Desktop connections
Vagrant users may use the vagrant rdp command to access a vagrant vm so we want to make sure this is turned on:
$obj = Get-WmiObject -Class "Win32_TerminalServiceSetting" -Namespace root\cimv2\terminalservices
$obj.SetAllowTsConnections(1,1)
Enable CredSSP (2nd hop) authentication
Users may want to use powershell remoting to access this server and need to authenticate to other network resources. Particularly on a vagrant box, this may be necessary to access synced folders as a network share. In order to do this in a powershell remoting session, CredSSP authentication must be enabled on both sides. So we will enable it on the server:
Enable-WSManCredSSP -Force -Role Server
Enable firewall rules for RDP and winrm outside of subnet
Server SKUs will not allow remote desktop connections by default and non domain users making winrm connections will be refused if they are outside of the local subnet. So lets turn that on:
Set-NetFirewallRule -Name WINRM-HTTP-In-TCP-PUBLIC -RemoteAddress Any
Set-NetFirewallRule -Name RemoteDesktop-UserMode-In-TCP -Enabled True
Shrink PageFile
The page file can sometimes be the largest file on disk with the least amount of usage. It all depends on your configuration but lets trim ours down to half a gb.
$System = GWMI Win32_ComputerSystem -EnableAllPrivileges
$System.AutomaticManagedPagefile = $False
$System.Put()

$CurrentPageFile = gwmi -query "select * from Win32_PageFileSetting where name='c:\\pagefile.sys'"
$CurrentPageFile.InitialSize = 512
$CurrentPageFile.MaximumSize = 512
$CurrentPageFile.Put()
You will need to reboot to see the page file change size but you can continue on without issue and reboot later.
Change the powershell execution policy
We want to make sure users of the vagrant box can run powershell scripts without any friction. We'll assume that all scripts are safe within the blissful confines of our vagrant environment:
Set-ExecutionPolicy -ExecutionPolicy Unrestricted
Unrestricted. To some its an execution policy. Others - a lifestyle.
Install Important Windows Updates
Not gonna bore you with the details here. Simply install all important windows updates (dont bother with optional updates), reboot and repeat until you get the final green check mark indicating you have gotten them all.
Cleanup WinSXS update debris
Now that we have installed those updates there are gigabytes (not many but enough) of backup and rollback files lying on disk that we dont care about. We are not concerned with uninstalling any of the updates. New in windows 8.1/2012 R2 (and back ported to win 7/2008R2) there is a command that will get rid of all of this unneeded data:
Dism.exe /online /Cleanup-Image /StartComponentCleanup /ResetBase
This may take several minutes, but if you can make it through the updates, you can make it through this.
Additional disk cleanup
On windows client SKUs you have probably used the disk cleanup tool to remove temp files, error reports, web cache files, etc. This tool is not available by default on server SKUs but you can turn it on. We will go ahead and do that:
Add-WindowsFeature -Name Desktop-Experience
This will require a reboot to take effect, but once that completes, the "Disk Cleanup" button should be available on the property page from the root of our C: drive or we can launch from a command line:
C:\Windows\System32\cleanmgr.exe /d c:

Go ahead and check all the boxes. Chances are this wont get rid of much on this young strapping box but might as well jettison all of this stuff.
Features on Demand
One new feature in server 2012 R2 is the ability to remove features not being used. Every windows installation regardless of the features enabled (IIS, Active Directory, Telnet, etc) has almost all of these features available on disk. However the majority will never be used and there is alot of space to be saved here by removing them.
Its really up to your own discretion as to what features you will need. In this post we are going to remove practically everything other than the bare essentials for running a GUI based server OS. If you plan to use the box for web work, you may want to go ahead and enable IIS and any related web features you think you will need now. Once a feature is removed, some features are easier to restore than others. For instance, the telnet-client feature will just be downloaded from windows update server if you choose to add it later. However, if you need to re-add the desktop-experience feature, you will need installation media handy and must point to a source .wim file. I really don't know what the logic is that determines what can be downloaded from the public windows update service and what cannot but its good to be aware of this.
First we will remove (not uninstall yet) the features that are currently enabled that we do not need:
@('Desktop-Experience',
  'InkAndHandwritingServices',
  'Server-Media-Foundation',
  'Powershell-ISE') | Remove-WindowsFeature
Now we can iterate over every feature that is not installed but 'Available' and physically uninstall them from disk:
Get-WindowsFeature |
? { $_.InstallState -eq 'Available' } |
Uninstall-WindowsFeature -Remove
At this point its a good idea to reboot the vm and then rerun the above command just to make sure you got everything. For some reason I find that the InkAndHandwritingServices feature is still lying around. A fantastic feature I have no doubt but trust me, you don't need it.
Defragment the drive
Now we will defrag and possibly retrim the drive using the powershell command:
Optimize-Volume -DriveLetter C
Purge any hidden data
Its possible there is unallocated space on disk with data remaining that can hinder the ability to compact the disk and also limit the compression algorithm's ability to fully optimize the size of the final box file. There is a sysinternals tool, sdelete, that will "0 out" this unused space:
wget http://download.sysinternals.com/files/SDelete.zip -OutFile sdelete.zip
[System.Reflection.Assembly]::LoadWithPartialName("System.IO.Compression.FileSystem")
[System.IO.Compression.ZipFile]::ExtractToDirectory("sdelete.zip", ".")
./sdelete.exe -z c:
Shutdown
Stop-Computer
Packaging the box
At this point you should hopefully have a total disk size of roughly 7.5GB. For a windows server, thats pretty good. We are now ready to package up our vm into a vagrant .box file that can be consumed by others. The process for doing so is going to be different on Hyper-V and Virtualbox so I will cover both separately.
Hyper-V
First thing, compact the vhd:
Optimize-VHD -Path C:\path\to\my.vhd -Mode Full
On my laptop, the VHD just shrank from 13 to 8 GB.
Next we will export the VM:
Export-VM -Name win2012R2 -Path C:\dev\vagrant\Win2k12R2\test
Note that my VM name is win2012R2 and after this command completes, I should have a directory named c:\dev\vagrant\Win2k12R2\test\win2012R2 with three subdirectories:
- Snapshots
- Virtual Hard Disks
- Virtual Machines
We can delete the Snapshots directory:
Remove-Item C:\dev\vagrant\Win2k12R2\test\win2012R2\Snapshots -Recurse -Force
Now there are two text files that we want to create in the root c:\dev\vagrant\Win2k12R2\test\win2012R2 directory. The first is a small bit of JSON:
{
  "provider": "hyperv"
}
Save this as metadata.json. Lastly, and this is optional, we will create an initial Vagrantfile:
# -*- mode: ruby -*-
# vi: set ft=ruby :

VAGRANTFILE_API_VERSION = "2"

Vagrant.configure(VAGRANTFILE_API_VERSION) do |config|
  config.vm.guest = :windows
  config.vm.communicator = "winrm"
end
By adding this to the Box, it ensures that a user can run vagrant up without any initial vagrant file, and have a succesful windows experience. However, it is customary for most vagrant projects to include these settings in their project Vagrantfile in which case having this file in the box file is redundant.
We are now ready to create the final box file. This is expected to be a .tar archive with a .box extension. The name (before the extension) doesn't matter but keep it short with no spaces. I found that not just any tar archiver will work on windows and this can be a big stumbling point on a windows system where tarring is not "normal" and you may not even have tar.exe or bsdtar.exe installed.
A note of caution: You obviously have vagrant installed and vagrant comes with a version of bsdtar.exe compiled for the windows platform. However, as of version 1.6.5, this executable will not work on tar files with a final size greater than 2GB. Sadly, ours will be greater than that. Also, if you have GIT installed, it too has a tar.exe installed with similar limitations. Many may assume they can create a .tar using the popular 7zip. Technically this is true but I have not been succesful in having the final .tar play nice with vagrant. I have had success with two available solutions:
- The version of tar.exe that is available with cygwin. I'm not a big cygwin fan and this tar requires several command switches be properly set to produce an archive that will work with vagrant: tar --numeric-owner --group=0 --owner=0 -czvmf win2kr2.box * is what worked for me. The options here ensure the ACLs are cleared out and the m option clears the timestamps.
- (recommended) Nikhil Benesch has been kind enough to make available a version of bsdtar.exe that works great and can be downloaded here.
So assuming you have Nikhil's bsdtar on your path, run this inside the same directory that holds your exported Hyper-V directories and the two text files (metadata.json and Vagrantfile) you created:

bsdtar --lzma -cvf package.box *
Very important: the --lzma switch instructs bsdtar to use the lzma compression algorithm. This is the same algorithm 7zip uses as its default. This can dramatically reduce the size of the final box file (like 40%) over gzip. It also dramatically increases the time (and CPU) bsdtar will take to create the file. So some patience is needed but in my opinion it is well worth it. This is a one time cost and it will NOT impact decompression time which is what really matters.
VirtualBox
We will be following roughly the same process we used for Hyper-V with a couple deviations. Note that the instructions that follow differ from the guidance given in the vagrant documentation as well as most blogs. These instructions are optimized for a small file size. You can use the vagrant package command to produce virtualbox packages but that will produce a much larger file (3.9GB vs 2.75GB) than the steps that follow.
The first main difference is that we will not compact the .vmdk. Virtualbox can only compact its native .vdi files. This is ok since the final compression step will take care of this for us.
First step: export the virtualbox VM:
vboxmanage export win2012r2 -o box.ovf
Here win2012r2 is the name of the vm in the virtualbox GUI. It is important that the name of the outputted .ovf file is box.ovf. Do not use a different name.
Now for something not so intuitive: delete the exported .vmdk file that was created. It is dead to us. Regardless of the initial file type you use to create a virtualbox vm, the export command will always convert the drive to a compressed .vmdk. This compression is not ideal. What you want to do after deleting this file is copy the original .vmdk file of the vm to the same directory where your box.ovf file exists and rename it to the same name of the .vmdk you just deleted. This should be box-disk1.vmdk.
This is why we used a .vmdk (the native vmware format) in the first place. Later when this file is imported back to virtualbox by vagrant, it is going to expect a vmdk file. However, if we used the one compressed by the export command, we are stuck with the compression it yields. By using the original uncompressed .vmdk, we allow the archiver to use lzma and can get a MUCH smaller file.
Just as was shown with Hyper-V above, we want to add the same two text files to this export directory but their contents will be slightly different. The first one, metadata.json should contain:
{
  "provider": "virtualbox"
}
Next our Vagrantfile should look like:
# -*- mode: ruby -*-
# vi: set ft=ruby :

# Vagrantfile API/syntax version. Don't touch unless you know what you're doing!
VAGRANTFILE_API_VERSION = "2"

Vagrant.configure(VAGRANTFILE_API_VERSION) do |config|
  config.vm.guest = :windows
  config.vm.communicator = "winrm"
  config.vm.base_mac = "080027527704"
  config.vm.provider "virtualbox" do |v|
    v.gui = true
  end
end
Your file should have one key difference. Make sure that the MAC address matches the one in the settings of your VM. I'm pretty sure its gonna be different. So you should now have four files in your export directory:
- box.ovf
- box-disk1.vmdk
- metadata.json
- Vagrantfile
Navigate to this directory. I'm on an ubuntu desktop so I'm just gonna use the native tar. If you are on a windows host. Follow the same instructions for the compression above for Hyper-V. On my linux box I will package using:
tar --lzma -cvf package.box *
Again, the name of the box file other than the extension is not important. Also, this may take a long time. Maybe an hour. Its worth it. Its a one time cost and while much longer than producing a gzip archive, you should end up with a 2.75 GB file that will take just as long to import as the same 3.9GB file gzip would produce.
Its a win-win!
Do I have to create the box twice?
No. You can create the box in Virtual box and then clone to a .vhd based box. Then you can create a new Hyper-V VM and instead of creating a new drive, use the existing .vhd from your virtualbox vm. Just make sure your Hyper-V vm is a generation 1 vm. Thats probably the easiest way to do it. You could also create the vm in Hyper-V and then create a .vhd based virtualbox vm using your Hyper-V vm instead of creating a new one. Then copy the vhd to a vmdk based vm. Granted this is still not an ideal or seamless migration but it is one way to get around having to run through the entire box preparation twice and ensuring the two boxes are identical.
Testing your box
Before going to the trouble of uploading your box to the web and making it public, you will want to test vagrant up on the package you just created locally. This is just three commands:
vagrant box add test-box /path/to/package.box
vagrant init test-box
vagrant up
This first places the box into your global vagrant cache. By default this is a folder named .vagrant.d in your home directory. You can move it by creating an environment variable VAGRANT_HOME that points to the directory where you want to keep it. I keep mine on a different drive.
Next, vagrant init creates a Vagrantfile in your current directory so that now any time you want to interact with this box, issuing vagrant commands from this directory will affect this box.
Vagrant up to Hyper-V
Finally vagrant up will create the box in your provider and start it. For Hyper-V, or any provider other than virtualbox, you need to either include a --provider option:
vagrant up --provider hyperv
or you can set an environment variable VAGRANT_DEFAULT_PROVIDER to hyperv.
Uploading your box to the world wide web
In order for your packages to be accessible to others, you are gonna want to do two things:
- Upload the .box files somewhere where they can be accessed via HTTP.
- Optionally, publish those URLs on VagrantCloud.
You have lots of options for where to place the box files. Amazon S3, Azure storage and just recently I have been using CenturyLink Cloud object storage. I believe dropbox works but I have not tried that. Here is a script I have used in the past to upload to my Azure storage account:
$storageAccountKey = Get-AzureStorageKey 'mystorageaccount' | %{ $_.Primary }
$context = New-AzureStorageContext -StorageAccountName 'mystorageaccount' -StorageAccountKey $storageAccountKey
Set-AzureStorageBlobContent -Blob 'package.box' -Container vhds -File 'c:\path\to\package.box' -Context $context -Force
Publishing your box to VagrantCloud.com
You can certainly share your vagrant box once accessible from a URL. You simply need to share a Vagrantfile with a url setting included:
config.vm.box_url = "https://wrock.ca.tier3.io/win2012r2-virtualbox.box"
This tells vagrant to fetch the image from the provided URL if it is not found locally. However, vagrant hosts a repository where you can store images for multiple providers and where you can add documentation and versioning. This repository is located at vagrantcloud.com and allows you to give a box a canonical identifier where users can get the latest version (or specify a specific version) of the box compatible with their hypervisor.
Simply create an account at vagrantcloud. Creating an account is free as long as you are fine with your box files being public and you host the actual boxes elsewhere like amazon, azure or CenturyLink Cloud. Once you have an account, you can create a box which initially is composed of just a name and description.

Next you can add box URLs for individual providers that point to an actual .box file. With a paid account you can host the box files on vagrant cloud.

Now your username and box name form the cannonical name of your box. Vagrant will automatically try to find boxes on vagrantcloud if the box cannot be found locally. Every box on vagrantcloud includes a command line example of how to invoke the box. So my box, Windows2012R2 can be installed by any vagrant user by running:
vagrant init mwrock/Windows2012R2
If I am on my windows box with Hyper-V, it will install the Hyper-V box (make sure to add --provider hyperv to your vagrant up command or set the VAGRANT_DEFAULT_PROVIDER environment variable). On my Ubuntu desktop with VirtualBox it will download the VirtualBox box. After it downloads the box, it caches it locally and does not need to download again.
So there you have it a free windows box under 3GB. Ok...ok, thats still crazy huge but I didn't name this blog Hurry up and wait! for no reason. A little hurry...a little wait...ok maybe alot of wait...whatever it takes to get the job done.