I have been experimenting lately with different network configurations and exploring ways to automate the setup and deployment of VMs in conjunction with Boxstarter. Along the way I have bumped up against some problems and discovered more than one way that many on the net recommend configuring a Windows 8 Hyper-V setup on a wireless network. In the process of this experimentation I have also managed to, more than once, screw things up. I’ll start with the screwing things up part.
Problem: cant create a Hyper-V network due to catastrophic failures
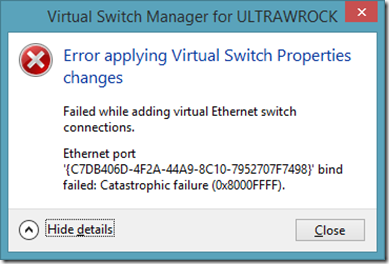
A few months ago my laptop ended up in a state where I could not create an external network on my Hyper-V virtual switch. All attempts resulted in a catastrophic failure which included the guid of the Network Interface and the hex code 0x8000FFFF.
Ethernet port '{C7DB406D-4F2A-44A9-8C10-7952707F7498}' bind failed: Catastrophic failure (0x8000FFFF).
After hours of futile random attempts to fix this and little to no clues from google, I arrived at a hypothesis that this was somehow connected to my VirtualBox setup that I had since uninstalled but there were some Network interfaces left over that I could not seem to remove. I ended up repaving my OS to get back to a good state.That was clearly not the solution I was hoping for.
SIDEBAR: I have been working on a project called Boxstarter off and on for the past year. This allows one to rebuild a machine in a scripted manner. It leverages the functionality of Chocolatey and adds an environment that is reboot resilient and also exposes some handy Cmdlets that tweak windows configuration and install updates. So this was not such a big deal since I can have my familiar dev environment back in about an hour.
Last weekend I started running into the exact same scenario and error. However, I have been doing some experimenting with different network and Hyper-V configurations lately and found a clue that helped me to recover without reinstalling my OS.
The Solution
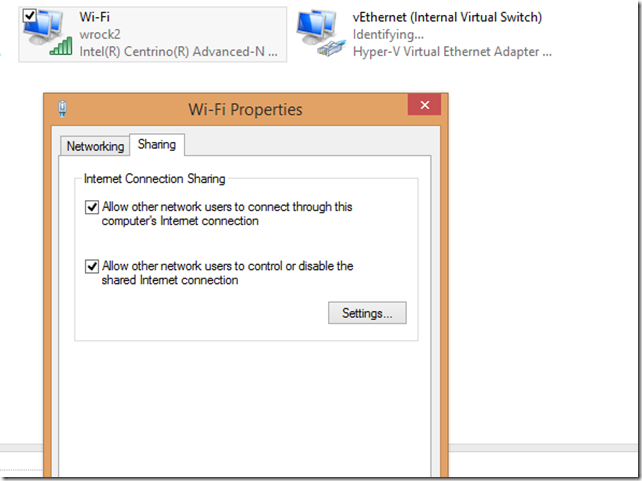
For those that do not care to read on, this was the issue: I had previously setup an “Internal Network” in Hyper-V and “Shared” my wireless adapters internet connection with my Hyper-V Internal Network. I later removed the Internal Network but did not turn off sharing on my wireless adapter first. A Shared network interface cannot be bridged, which is what is used when you create an External network on a wireless connection. Oddly even attempting to create a new Private hyper-v network was failing but with a different but equally unhelpful error. The key problem here is now that I only had one network adapter, the ability to turn on or off sharing was no longer available. The adapter was shared:
but I could not go to the properties page, go to the “Sharing” tab and then turn off sharing. The Sharing tab was no longer present.
This problem is further complicated by the fact that even on Powershell 3 and 4 with all of its new Networking cmdlets, there is no cmdlet that can turn on or off Internet Connection Sharing. However, there are a set of COM interfaces that expose the sharing properties of a network interface. This script disabled my internet sharing and allowed me to then create a new Hyper-V network:
function Disable-ICS{    $cfg = New-Object -ComObject HNetCfg.HNetShare.1    $all = $cfg.EnumEveryConnection    foreach($conn in $all){        $shareCfg=$cfg.INetSharingConfigurationForINetConnection($conn)        $props=$cfg.NetConnectionProps($conn)        $props        $shareCfg.DisableSharing()    }}

Disable-ICS
Hyper-V, Wireless Adapters, and a connected VM
One of the great things about Windows 8 is that one can run a Hyper-V server and host guest VMs. Given that I use my personal laptop to develop Boxstarter. Being able to test machine installs makes running VMs a necessity and I much prefer running the lighter weight Windows 8 over Server 2012. Also given that I am working on a laptop, I am always using a wireless connection.
The challenge of a wireless adapter
Prior to the Windows 8 implementation of Hyper-V, a Hyper-V VM could only connect to an external network through a wired network adapter. Since Hyper-V supports a Layer-2 switch, it routes traffic based on the MAC address of the virtual network adapters. A wired adapter can run in promiscuous mode and allow packets to be transmitted with the MAC address of the virtual NIC. A wireless adapter can only send traffic with its own MAC address. To mitigate this issue, the Windows 8 Hyper-V uses a bridged adapter to bridge the wireless NIC and the virtual NIC. Although the virtual MAC address is replaced by the wireless adapter’s MAC address when a packet is sent, the bridge maintains a mapping of virtual IP addresses to their MAC addresses so that traffic can be properly routed back to the correct VM.
Two ways to connect your Windows 8 VMs to the internet
#1: Using an External Network Switch
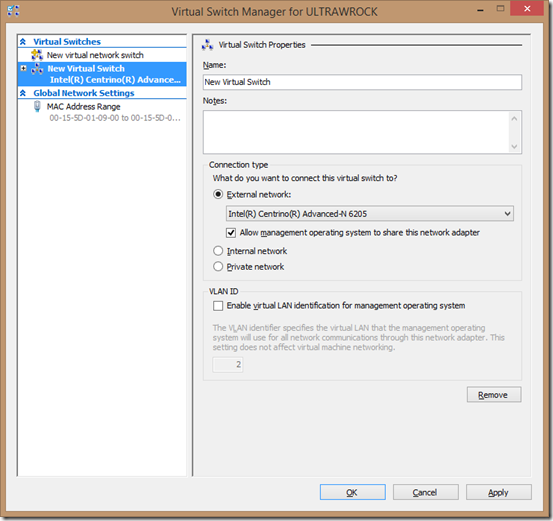
This is essentially exactly what I have just outlined above. In the Hyper-V manager (this can also be accomplished using the Hyper-V powershell module), go to the Virtual Switch Manager and create an External network binding to your wireless network adapter:
As previously described, this will create a new network adapter (the virtual adapter) and a network bridge that connects the virtual and wireless adapters.
 Finally go to the “Add Hardware” section of your VM while it is turned off and add a Network Adapter assigning it to the switch you just created. Now your VMs access the same external network as the host as if they are simply another device attached to your wireless router and assigned their own IP from your router’s DHCP server.
#2: A Shared Internal Network
There is another option to connect your VMs to the internet besides using an External Virtual switch as described above. This includes the creation of an Internal virtual switch instead of an external one. An Internal switch establishes a connection between the guest VM and the host but not to the outside world. Ok. So how in the heck will that connect a VM to my internet? Well after you create the Internal switch:
 You will “Share” your wireless adapter with the internal switch.
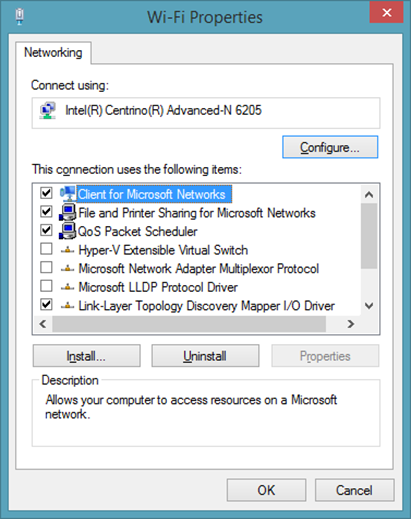
Note that when you have one or more internal network adapters, the “sharing” tab becomes available in your WIFI adapter’s properties. If you had more than one internal adapter, you would also see a drop down menu allowing you to choose which internal adapter to share. Once you add the internal adapter to your VM, you should be able to access your host internet connection from your guest. Maybe…
Which method should I u…Maybe?…What does that mean?
If you have done much if any investigation already on setting up a windows 8 VM client on a wireless network, you have likely run across accounts of others having issues getting connectivity setup just right and also seen others advising to follow one of the two above methods. Sometimes the recommendations are reported to work but other times the individual seeking help states that they still cannot establish connectivity.
I’ve been tinkering with this for months and have several times fallen into a state where I have followed every step but things fail to work. This technology is fairly young and still, IMHO rather fragile. Usually the fix is something like rebooting the host or guest, disabling/enabling one of the adapters, fiddling with the network bindings (YUCK!), or toggling the network sharing on or off. None of these solutions inspire much confidence, but sometimes the answer to which approach works best is whichever approach simply works for you.
Fragility Aside, what are some of the nuances of each
The Bridged External Switch is the more stable
My personal experience is that the bridged network is more stable and the connectivity is the most “full featured.” I did go through a bout of having to reset the bridged connection and rebinding its IPv4 and IPv6 bindings after each reboot or sleep cycle. That was quite annoying and I eventually wrote this script to automate the process:
function Reset-NetAdapters { $bindings = @( "Client for Microsoft Networks", "Internet Protocol Version 6 (TCP/IPv6)", "Internet Protocol Version 4 (TCP/IPv4)" ) $bindings | %{ Enable-NetAdapterBinding -Name "Network Bridge" -DisplayName $_ } Disable-NetAdapter "vEthernet (Virtual Switch)" Enable-NetAdapter "vEthernet (Virtual Switch)"}
When I installed the Windows 8.1 preview that went away but I honestly think that was more the fault of an OS overhaul than windows 8.1 specifically.
This also seems to be the “official” or “supported” approach. It was even mentioned in Stephen Sinofsky’s blog.
The Internal switch can be unreliable but adds some privacy
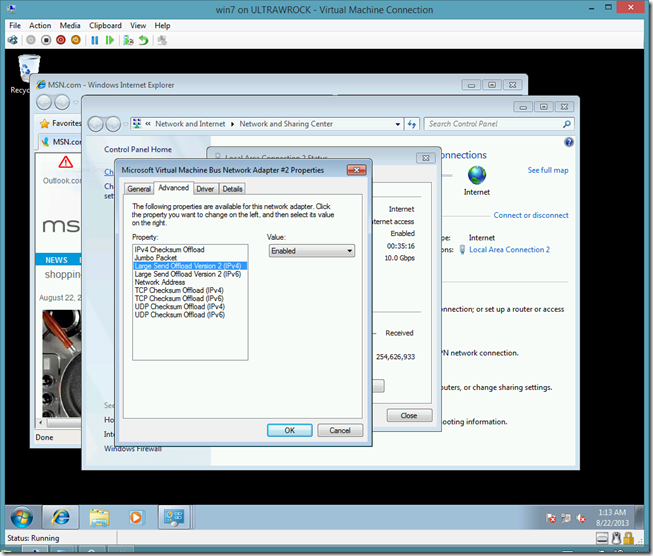
If you simply want to access the web or access files on the host, the connectivity provided here should be fine. However I did run into some odd bumps. For example, windows updates did not work at first until I discovered this very cryptic fix: on the guest NIC, go to the advanced configuration settings and disable the “Large Send Offload” settings for both IPv4 and IPv6.
Also, while this allows your guest VM to access the outside world, the outside world cannot see it. This can be good or bad depending on how you want to use the VM. The benefit is some added security. The VM is not actually on the external network and therefore others in your network cannot ping it or access its shares. But then maybe that is exactly what you want to do. This is basically using NAT (network address translation) and assigns the guest VM its own address when transmitting communication outside of the internal network. This is the default networking method used by VirtualBox and is most convenient if you have a limited number of IP addresses and don’t want to assign a separate address to every device.
Hopefully you have found this usefull and especially if you are suffering from good old 0x8000FFFF, the SEO gods have provided you a solution more quickly than it took me to find.
